We’re Hiring: Greengoods Sales Associate

Posted on by

shrubs2Warner’s Nursery & Landscape Co. is now accepting applications for a Greengoods Sales Associate. Scroll down for a complete job description. If you do not meet the qualifications, or are not willing to work weekends and holidays, please do not apply.

To be considered, please download and complete our application form and email to [email protected]. Application forms are also available at the Nursery, and completed applications can be dropped off there.

Job Description: The Greengoods Sales Associate provides excellent customer service, making sure all customers are greeted and helped when entering the outdoor nursery areas. You will be responsible for creating and maintaining a vibrant, fresh, and clean appearance in the outdoor nursery at all times. Providing a comfortable, educational, safe and relaxing shopping experience is your top priority.

Duties and Responsibilities:
Sales & Customer Service

  • Greet & service customers with a friendly, helpful attitude
  • Will be required to improve oneself in the art of salesmanship ie, Tie in Sales, plant & product knowledge
  • Will be responsible for loading customers’ vehicles when necessary
  • Will be required to work weekends, holidays and long hours
  • Must report to work with a clean, neat appearance, even though jobs throughout the day will soil clothing, also must have the required tools
  • Must be aware of all current sales & promotions

Daily Operations

  • Maintain a clean sales area by weeding, sweeping, and plant maintenance as needed
  • Learn proper watering procedures and assist watering crew in maintaining healthy plants by acknowledging a dry plant and addressing it immediately
  • Assist in unloading trucks
  • Display & Redisplay plant material as needed
  • Assist Yard Foreman & Greengoods Manager in their daily tasks as needed

Physical Requirements: This is a highly physical job – you will be on your feet most of the time, and will be outdoors most of the time. You will occasionally be kneeling, climbing, operating machinery, and required to lift/carry or push/pull items weighing more than 25 lbs. It can be a fast-paced environment with frequent interruptions.

About Warner’s Nursery: Warner’s Nursery & Landscape Company is a family owned nursery, operating in Northern Arizona, United States. We feature a retail nursery and garden center, as well as a residential and commercial landscape construction, design/build, and landscape maintenance company. We are dedicated to helping our customers succeed in their gardens, given our many different micro climates in Northern Arizona. At Warner’s, we understand that benefits matter. Our competitive offering (for these positions) includes:

  • 401K
  • Paid time off
  • Health benefits
  • Generous Employee Discounts
  • Professional growth and development opportunities AND a work environment where Respect, Integrity and Balance are just a few of our fundamental values!

Interested and qualified applicants, please download an application here or pick one up at Warner’s Nursery. Completed applications can be emailed to [email protected] or dropped off at the store. No phone calls please.

Houseplant of the Week: Neon Philodendron

Posted on by

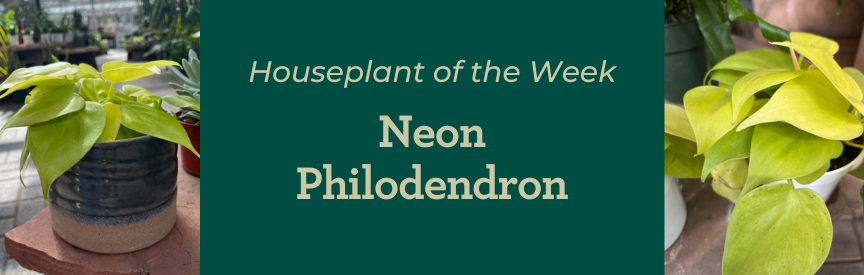
You’ve got to love this leaf. The golden hue of neon philodendron’s heart-shaped foliage makes it a stand out addition to your home’s dĂ©cor. Additionally, those bright leaves mean that your Neon will work well in a variety of light and with minimum fuss.

Here are some guidelines when cultivating your Neon Philodendron.

Light: While her golden-lime leaves tolerate lower light than other philodendrons, brighter light will reward you will more baby leaves during the growing season, which are even more beautiful (if you can imagine that) with a blush/golden color. No direct sunlight, however, or those leaves will burn.

Water: Neon likes deep drinks of water, so drench the soil and then let it dry out. When the top two or three inches of soil dry out, give Neon another good soak – although you can let your plant dry out almost completely between waterings during the winter.

Soil: A good, fast-draining soil is best. You don’t want your plant sitting in water.

Humidity: Another area where this plant is easy-peasy is its humidity requirements. However, Neon is a plant native to tropical Brazil, so it does slightly better with more humidity and will probably give you larger leaves. Consider periodic misting, which will also help you clean off any dust on your plant.

Fertilizer: You can feed your Neon while it’s growing, but scale back during the winter.

Houseplant of the Week: Hypoestes

Posted on by

Are you seeing spots? You might very well be looking at Hypoestes, better known as the polka dot plant.

It’s freckly decorative leaves make this a popular outdoor ornamental plant, but it’s vivid oval variegated foliage, in either green and white or green and pink, can also be cultivated as a houseplant.

Even better, it’s easy to propagate your Hypoestes. They get small flowers that will produce seeds that you can germinate in warm moist soil, but the easiest method for propagation is from plant cuttings. Dip your cuttings in rooting hormone and place in peat moss.

Caring for Your Hypoestes

Your freckle-faced plant gets its best color when it is in a low light situation, but you may have to deal with canes of the plant getting “leggy” as they search for light. Indirect bright sunlight is the best for this plant.

Hypoestes does not like the cold and needs temperatures of at least 60 degrees. They like well-drained but moist soil and should be fed once a month.

Houseplant of the Week: Ficus Trangularis

Posted on by

Probably the easiest of the ficus plant species to grow, ficus triangularis (or triangle fig) offers all the beauty of most ficus plants, but it’s the least fussy. This makes it a perfect plant for beginners.

The name comes from the plant’s triangle-shaped leaves that are typically variegated with dark, waxy green centers morphing into cream-colored soft edges. This striking combination makes this plant a highly decorative addition to your indoor decor.

The plant grows slowly, but can reach heights of four to eight feet, so the cute centerpiece on your table today could eventually grow into a nice floor plant with time.

Caring for Your Triangle Fig

Soil: Ficus triangularis requires a rich, well-draining potting mix.

Water: The triangle fig likes deep watering and then being able to dry out before being watered again. Wait until the top third of the plant’s soil is dry before watering. Do not allow your ficus to sit in standing water.

Light: Bright, indirect light year-round is perfect for this plant. If you find that your plant is dropping leaves or losing its variegation, it’s likely it’s not getting enough light.

Fertilizer: Feed once a month from spring through fall and refrain from feeding during the winter.

Seed Potatoes!

Posted on by

It officially became spring this week and that can only mean one thing – it’s seed potato season!

Yes, you can easily grow your own tubers to enjoy baked, mashed, scalloped or fried.

Potatoes require little maintenance and don’t even require much space to grow, so whether you have a huge garden or are growing potatoes in an apartment, you’ll have lots of delicious starchy goodness to enjoy.

Because tubers will grow in the soil that lies between the surface and the original potato start, it’s important to mound additional soil on top of the emerging plant. You may have do this a couple of times in the early stages of growth, so plant your potatoes in an area that allows you to mound the dirt over them.

Here’s how you can grow potatoes in six easy steps.

Step 1: Choose where to plant.

It can be in the ground, a raised bed, or a planter box. Just remember that potatoes need a soil depth of about two feet to grow in, and they will rot if left to sit in wet soil; make sure your have good drainage wherever you plant.

Step 2: Choose your potato.

No, you shouldn’t use potatoes from the grocery store. Why? Because most store potatoes are treated with a “sprout retardant” which gives them a longer life in your pantry, but doesn’t work for planting. What you want is certified seed potatoes from a reputable garden center like Warner’s Nursery.

In terms of variety, you’ll want to choose a potato that best suits your taste and how you plan to cook them:

  • Fingerling – Low in Starch. Use: Roasted potatoes, steamed or broiled potatoes
  • Red Skinned – Low in Starch. Use: Potato Salads, Gratins, Fried potatoes
  • Yukon Gold – Medium Starch. Use: Baked Potatoes, Mashed Potatoes, Soups
  • Russet: High in Starch. Use: Baked Potatoes, French Fries, Potato Pancakes

Step 3: Plant the potato

Potatoes prefer slightly acidic soil but will perform well in almost any soil. If you are planting in a container, always choose a potting soil. If planting in the ground, garden compost works well.

Each eye of the potato will grow, therefore you can cut the potato into several pieces each with an eye. Allow the cuts to dry prior to planting.

Press the potato start about 6 inches into the soil with the eyes facing toward the sun. Cover the starts with soil. Remember to mound additional soil on top of the emerging plant, leaving some green foliage above the soil line so that the leaves can photosynthesize. (Another reason not to let the potatoes have direct exposure to the sun is that it will “green” the potato which can make them bitter – and potentially toxic!)

Step 4: Watering and fertilizer

Potatoes require minimal care. Keep the soil moist, but avoid over watering, which will cause the potatoes to rot. After the plant has grown a few inches tall, apply an organic fertilizer that is safe for edibles. This should be the only round of fertilizer you apply, as too much fertilizer will produce a large, lush plant; but few tubers.

Step 5: Let the foliage expire

If you are impatient (like me!), you can harvest the small baby potatoes as soon as the plant finishes flowering. Once the flowers are gone, the plant’s energy is completely invested in growing tubers. As the plant starts to turn yellow and die back, dig down and gently harvest a few potatoes to test their size. People willing to wait the full term for tuber maturity will know it’s time to harvest when the potato plant dies back completely.

Step 6: Harvest – and enjoy!

Depending on how you planted your potatoes, you will either need to dump out the container or dig them out of the earth. Once you’ve harvested all the potatoes, dispose of the soil and the expired plant. The nutrients in the soil are gone and it may harbor disease, so don’t reuse the soil or put in the compost pile.

Wash the potatoes, and allow them to air dry before storing. Harvested potatoes can be kept in a cool, dark location for several months.

Happy gardening!
Misti

Houseplant of the Week: Geogenanthus ciliatrius

Posted on by

A relative newcomer to the houseplant scene, Geogenanthus ciliatrius (or “Geo” for short), is a stunner originally from the rainforests of Ecuador and Peru. Until recently, it was relatively hard to come by, but last year Geo became the “it” plant, getting a lot of press in articles with headlines like “The 12 Coolest New Houseplants of 2022.”

It’s easy to see what the buzz is about.

The plant has large, shiny oval-shaped leaves that are so dark they almost appear black (typically, they start out green with a purple stripe and as they age the purple takes over and grows deeper and deeper in color).

But they are a bit tricky to cultivate. They prefer low-light areas, so don’t stick them on a windowsill or in a bright room. As befits their rainforest beginnings, they like their soil moist and their air humid. Let the top inch of soil dry out and then completely drench the plant when you water. Geo will quickly decline if its soil gets too dry. Use an evaporation tray to provide the humid air it craves.

You can feed your plant during the spring and summer, but not when it isn’t actively growing. In fact, over-fertilizing can do more harm than good.

Finally, “listen” to your Geo, because it will let you know when it needs some tender care. Curling or limp leaves? Probably your plant’s soil is too dry. Brown leaf edges? Geo is telling you it needs more humidity. Brown spots are usually caused by your plant being hit with direct sunlight.

Lastly, those large lovely leaves can get dusty, and this not only diminishes the look of the plant, it can also interfere with its biological functions. Rinse the plant off or wipe the leaves with a clean cloth periodically to keep your Geo healthy and looking beautiful.

Houseplant of the Week: European Cypress

Posted on by

Although you typically see European Cypress outside, with their tall columns of dense blue green conifer leaves, it is possible to grow this plant as a houseplant.

Despite names that link it with the European continent (it’s also commonly known as an Italian or Mediterranean Cypress), the tree’s roots are firmly in Persia – modern day Iran. You can, however, find this cypress growing wild in places like Greece, Turkey and Israel.

The dwarf version of the European Cypress does very well as a container plant, but you’ll need to replicate some of the conditions it would get if it was planted outside in your garden.

That means a picking a sunny location in your home with at least six hours of brightness and good air circulation.

European Cypress will tolerate almost any type of soil, but your pot should have good drainage to prevent root rot. You want to keep the soil moist, but not heavily saturated. Don’t let the soil dry out completely.

Your plant would also appreciate a misting about once a month.

Keep your European Cypress happy and you can have the joy of bringing the beauty of the outdoors right into your home.

Houseplant of the Week: Oxalis or ‘Shamrock’ Plant

Posted on by

With St. Patrick’s Day arriving in a few weeks, we thought we’d turn our attention to what’s often called the Shamrock houseplant – but in truth is the woodsorrel known as Oxalis.

Boasting hundreds of varieties, you’ll usually see oxalis with green or purple clover-like leaves.

They are also a relatively easy houseplant to cultivate. There is one very important thing to keep in mind however: these plants tend to go into dormancy during the summer. Don’t throw them out! They’re resting, not dead.

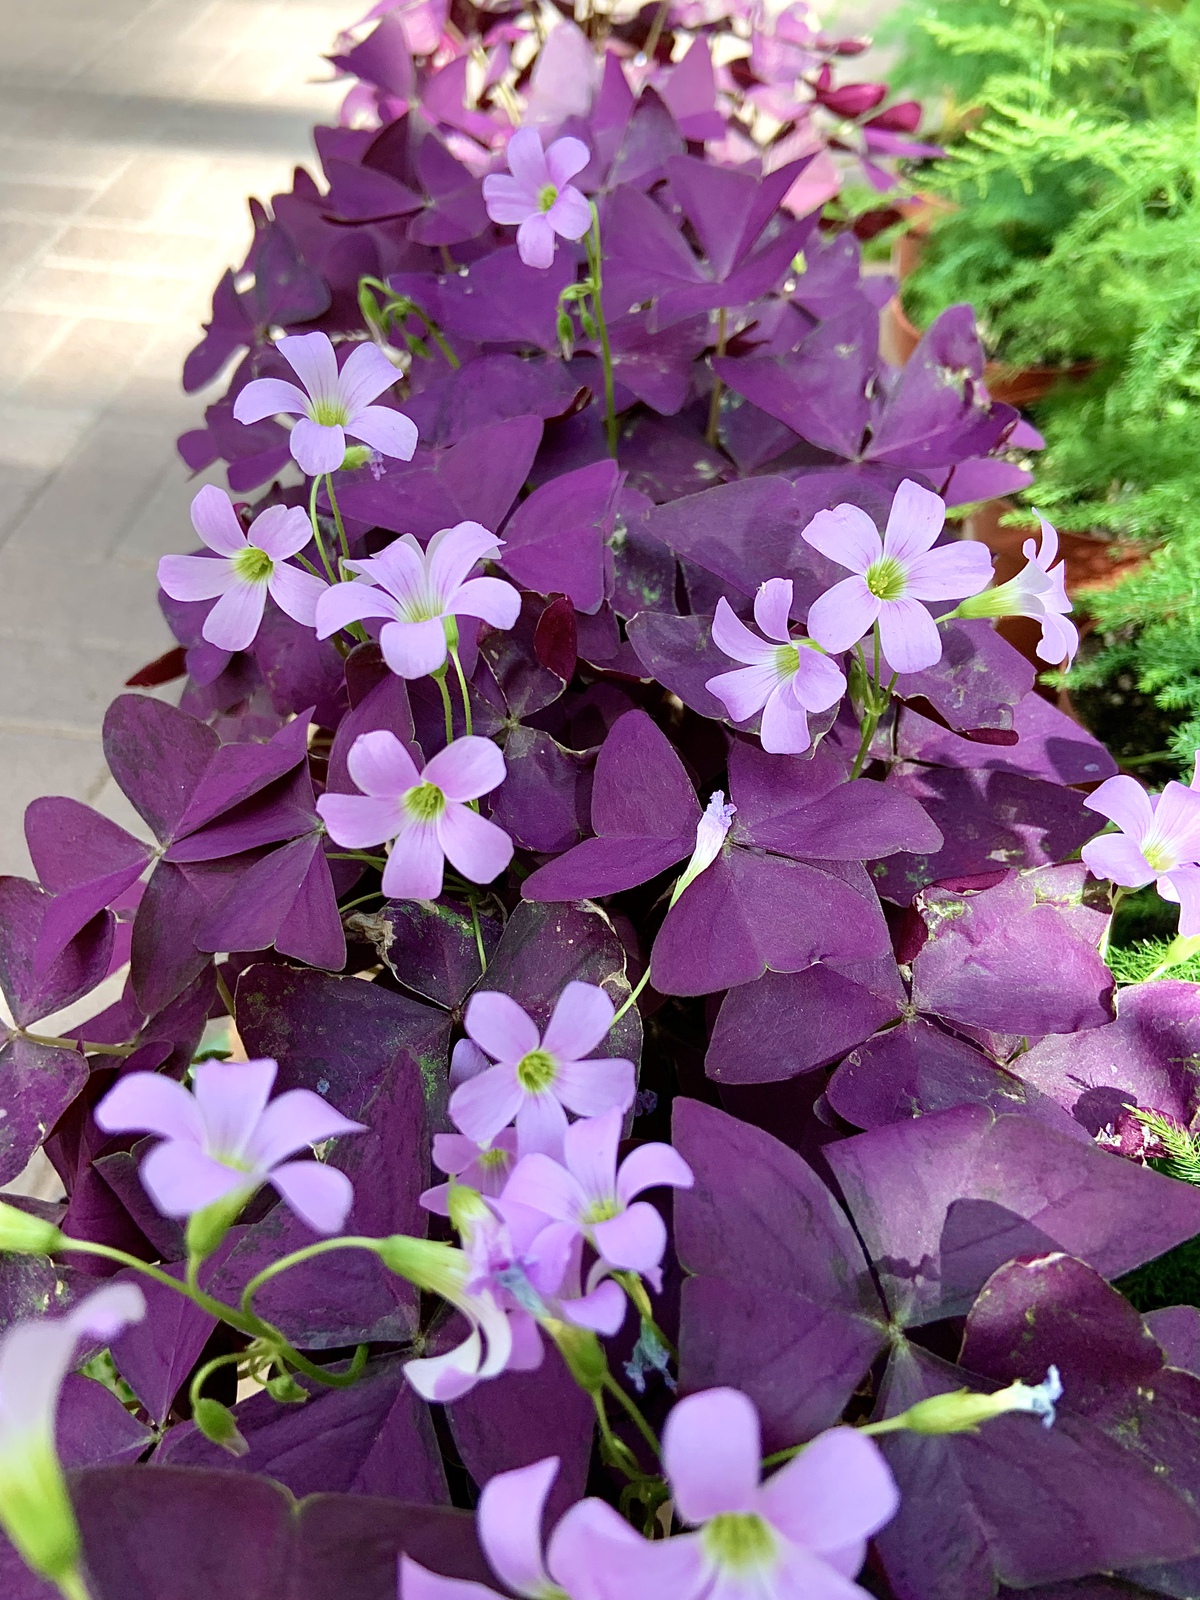
Caring for Your Oxalis

Soil/Watering: Your Oxalis would like lightly moist soil and make sure to let it dry out between waterings.

Light/Temperature: Room temperature and good air circulation are perfect for the oxalis. It likes bright, but not direct light. (Except when it’s resting, as we’ll explain below.)

Food: Fertilize with a balanced houseplant food every few months.

I’m not dead, I’m resting: In late spring or early summer, the leaves will begin to die, but the plant is still okay. It’s just going into its period of dormancy to rest. Move the plant to a cooler, darker location, away from direct light and leave it alone – no water or fertilizer.  Just check on your plant every couple of weeks; dormancy can last from several weeks up to about three months, depending on the plant and external conditions.

When you see new shoots, your oxalis has woken up and would love it if you moved it back into the light and resumed regular care.

Houseplant of the Week: Cyclamen

Posted on by

There’s something very romantic about cyclamen, one of our favorite winter houseplants.

Maybe it’s the petite blooms on long stems that stretch up above its green and silver foliage. Or the colors – cyclamen flowers come in shades of pink, violet, red and white and have a pleasing, sweet scent. Or those heart-shaped leaves.

All we know is that during Valentine’s Week, we can’t keep them in stock!

We mention that they are our favorite winter houseplant, because unlike most indoor plants, their dormancy period is in the summer. Cyclamen are “tuberous perennials,” meaning they die down to their thick roots (tubers) in the heat of summer, then re-emerge and bloom again as the temperatures cool in fall.

Here are some tips for cyclamen care:

Light: Bright and indirect light in winter when the plant is actively growing. When dormant, keep your cyclamen in a cool, dark area with good ventilation.

Soil: These pretty plants like organically rich soil that drains well. Potting soil does well, but you might want to add some peat in to increase the acidity slightly.

Water: When leaves are present, the plant is actively growing and you should water when the first inch of soil below the surface feels dry. Do not overwater! It’s a common way to kill these plants. Don’t get the leaves or crown of the plant wet, which can lead to rot.

When the plant is dormant during the summer, reduce watering. All you are trying to do during this time is prevent the soil from entirely drying out.

Temperature and Humidity – Cyclamen plants don’t like extreme heat or dry air. Keep them away from drafts too. During the winter, when our air is so dry, cyclamen really want high humidity. Our suggestion would be keeping your cyclamen on a tray with pebbles and water. Just make sure that it isn’t sitting in the water, as that can cause root rot.

Feeding Time – Your cyclamen would appreciate some diluted liquid low-nitrogen fertilizer every couple of weeks while in full leaf. You don’t need to feed your cyclamen while it’s dormant.

You Still Need to Water in Winter

Posted on by

It’s a question I get asked all the time at the nursery: Do you need to water your garden in winter?

Yes, you do.

While your garden has gone dormant, your plants still need water to fuel basic metabolic functions.

And while it might seem silly to mention this after the massive snowfall we’ve seen recently in Flagstaff, it’s meant to be a reminder to keep caring for your trees and plants this winter after the snow melts. As a rule of thumb, about 10 inches of snow equals about 1 inch of water, so even this historic snowfall won’t provide all the water your trees and perennials need for the season.

THIS RECENT MONSOONS & SNOW WERE EXCEPTIONAL

Arizona’s past two monsoon seasons and this month’s snowfall were exceptional, and not the rule for northern Arizona.

In general, our area tends to be arid, a trend that has worsened over the years because of climate change. Add to that the cold and wind of winter in Arizona’s high country and you have a perfect storm of conditions leading to very dry soil and a lot of drought stress for plants even in years with snow and rain.

HOW OFTEN (AND HOW MUCH) DO I NEED TO WATER?

You should plan on watering once or twice a month during the winter when there isn’t snow cover and temperatures are above 40 degrees. Because that watering schedule is so infrequent, you might want to put it in your day planner. And, of course, you’ll be watering by hand since you should have winterized any drip irrigation system you have.

Another question we often get is how much water is enough during the winter. It depends on the size of the tree, shrub or perennial plant and whether it is new or well-established.

As a general rule, you’ll need about 10 gallons of water for each diameter inch of the tree. For example, a two-inch diameter tree needs 20 gallons per watering. The trick is to water slowly; you can’t just dump 10 or 20 gallons of water all at once, as it will run off instead of soaking down to the roots.

Newly planted shrubs require about twice as much water as an established shrub needs. You should be looking at 5 gallons each time you water a new shrub and 2.5 gallons for shrubs planted at least a year ago. Make sure they are surrounded by mulch to help them retain the water.

Perennials vary, but know that those planted late in fall did not have as much time to establish their roots as the ones you put into the ground this last spring. Winter watering is highly advisable for late-planted perennials and ones located in windy or southwest exposures.

WHAT ABOUT FREEZES?

It’s a good idea to make sure that temperatures are going to hit about 40 degrees on the days you are watering, and you’ll want to water by midday to make sure it’s been absorbed before any nighttime freezes.

You’ll also want to try to water when it isn’t windy out. A drying wind could wind up carrying off the moisture you are trying to get to the roots of your plants.

By watering your garden in winter – even a winter like this one with lots of snow – you are increasing the chances that your garden, trees, shrubs and perennials will be lovely and lush next spring.

Happy gardening (and watering!)
Misti